Gillbanks Photography

Sunday, November 20, 2011

first post in a while...

Hello

I know it has been a while since I added a blog like this just i have not had the chance to...

This was a shoot I did with Jada Sezer a plus size model.


I have done more but you have to look on my FB Fan page for them.

I have a few more projects on the go so hoping to have more photos coming up soon.

Thursday, July 28, 2011

Photoshop retouching skin tutorial - Part 1

In this tutorial I will explain how to retouch a persons skin using Adobe Photoshop. I have also added a new technique that I have not seen detailed online before. Because this is a big subject I have broken the tutorial into three parts.

-----------------------------------------------------------------
Before and After
-----------------------------------------------------------------

Above you can see the photo we start with and then the final photo. I have given the photo a look like it has been developed incorrectly as the blue is stronger in the blacks and you can see more yellow in the main colours.

-----------------------------------------------------------------
Section - 1
Sharpness
-----------------------------------------------------------------

Look at the photos that you have taken - if they are slightly blurry they may need to be sharpened to improve contrast between edges of the different elements. This can be done on any photograph to improve the image.


The top photo that is slightly out of focus so I thought that I would make it clearer to make the details more obvious.


The gray thing is called High Pass which is a filtert in Photoshop. To find it you go Filter > Others > High Pass. Then you go to the Blending modes on the Layer Panel and click Soft Light as this will turn the normal photo a little sharper. Do not go to high or you lose the gray as that is what is saying do not sharpen this.


On this part of sharpening the photo I use a Filter called Smart Sharpen. What this does is it pulls up all the right information to boost what it looks like. You find the Smart Sharpen in Filter > Sharp > Smart Sharpen. Tweak the values so they look right, be careful as if you do too much it can look very wrong.


-----------------------------------------------------------------
Section - 2
Healing the skin
-----------------------------------------------------------------

This step hides all imperfections that you have on the subject. There are many different ways of doing this but this is the way I find easiest.


This is the Heal brush icon found in the tools pallete.


This photo shows a lot of skin imperfections and so I will use the healing brush to clean these up. To use it you press ALT on the keyboard and then click the mouse so a cross hair appears. You then paint areas on the image that need 'healing'. I do a lot of work with layers and the healing brush uses layers combining them into blocks of colour which simplifies things.

As you can see there is many different options that you can chose - I normally pick the base area below the blemish as you might have some lines marking out what you need to do as that might be a way to know what you have to change.


The image above shows the fixes I made for this photo.. This will not be seen in the final imge since the rest of the photo will be there to fill in the space. You can see what it looks like in the next section when it is put all together.

-----------------------------------------------------------------
Section - 3
Cloning out the non perfect parts
-----------------------------------------------------------------

I used the clone tool to remove the bags under the eyes and to smooth the skin further. This is ideally used at 10% transparency so that you can build layers of texture to keep things looking natural. You can also use the Opacity on the layer to pull back on what you are working on to give a hint of some texture.

This is the icon you are looking for the clone tool.


As you can see in this photo that the heal brush has done a good job. As we are know going to work on the cheeks and eyes as well as some other parts as this will take few minutes to get the right result from the Clone tool which you use in the same way as the Heal brush.


This is how the results of the clone tool look - without the rest of the background. The main thing about it is that you follow the lines of the face that you are using. This helps make it look real and different this would look different to your one as you can do the least two section in what ever order you like and how you like.


This tutorial continues on the next blog post or you can follow this link:
 http://gillbanksphotography.blogspot.com/2011/07/photoshop-retouching-skin-tutorial-part.html

Photoshop retouching skin tutorial - Part 2

This is continuing from the last blog post where I was talking about retouching the photo. This is the link to that post:
http://gillbanksphotography.blogspot.com/2011/07/photoshop-retouching-skin-tutorial-part_28.html


-----------------------------------------------------------------
Section - 4
Smoothing the skin out
-----------------------------------------------------------------

Here I will talk about different ways to smooth the skin out using a technique called airbrushing. I will show you an easy way to do this using layers. I use the Topaz Lapz Re-Mask plugin but it might be easer to use the eraser so you can remove what you do not need. The first picture shows where we are after the first part of the tutorial.


The next stage is to copy the layer by dragging this layer to the bottom of the layer panel and placing it on the small icon that shows a page with a bent over coner. It is next to the rubbish bin which is on the right had side at the bottom or you can hit Ctlr-Shift-Alt-E (Called Layer up) which will make a layer of everything visible in the layer pallet. We do this to make the next part easier in case you mess up. If there are problems all you have to do is delete this layer and make another one.


This is the rubber button and this is found in the tool panel.


As you can see in this image that I have taken out the background, cloths, lips, eyes, nostrils, eyebrows and the star make up. You should only take out things that you don't want to change, things that are sharp and clear.


What I have done is used a blur filter on this as that will show me how the skin should look at the end. I do this on a different layer again and I normally adjust the opacity for the layer so it does not look as strong. Be careful as this can easily look fake which is not the goal for this photo - it should look like real skin. Now make another layer so you can make the next layer look even better. There are two ways you can do this.

The first is to copy both layers and then merge them by right clicking and going to Merge layers. The other way is to have all the over layers turned invisible so you can do the layer up which I showed you earlier.


This is the two layers above mixed together with the Topaz Labz Clean filter which gives the feel of skin to the photo. I have again pushed back the opacity on the layer which will be seen in the final image.


As you can see this looks the much better then the start of this tutorial. it is also the mixture of all the images put together. As it is softer and smother over all.


-----------------------------------------------------------------
Section - 5
White balancing the photo.
-----------------------------------------------------------------

The best way to do this is to say to make one more layer by having all the layers visible and hitting the layer up way.


this is how the photo looks before colour balancing which is really easy to do. As you can see it looks a lot better than the first photo with good feel to the photo. This is a great photo that is looking airbrushed and smoothed out.


This is the best way to do the Curves and that is by getting this screen up and hitting auto button as this will save you time finding gray spots. To find the Curves you go to the fill and adjustment layers button at the layers palette which is half black and white in a circlar (This will be a new layer). There is a differnet way to do this which is Image > Adjustment > Curves, or the shortcut which is Ctrl-M (This will be on the last layer you have made).

-----------------------------------------------------------------
Section - 6
The layers used as well as the tools
-----------------------------------------------------------------

This section is to show how the layers look and where the tools I used are found. The final stage of the image is in the third tutorial.

These are the layers that I was talking about for your seeing pleasure. As you can see there is so many different things you can do.

This is layers that I have just shown you how to make and this is what it looks like in one big long list of layers. This also helps show you how the layer palette could look.

This is the toolbar that has all the tools that you would need to use and there is is a lot to them I have just picked. This is toolbar that you have got on the side. I have also made some more images of the tools that you might use.

These are the tools bars that I have used and would like to know how to use. If you like to know more how to use the no selected tools please stay tuned as I hope to write some more tuts about the story.

Tuesday, May 31, 2011

shooting on the themes.

I have done some shoot on the themes and other styles of shoots..


Monday, May 30, 2011

These are un-edited images of a make up shoot i have done today...

I think some of the best images I have done in while...  These are some of the best photos that I have done with a great make up artist...


Friday, May 27, 2011

1st exbo of the year

This is the 1st exbo of the year...but the rest will have more photos as there was not anothe space for them.....
This is the biggest picture out the set....

Wednesday, May 25, 2011

Jungle Queen (How I made it...)

Jungle Queen is my first attempt at a fantasy style image and I would like to know what people think. I am hoping this is good enough that people think I should do more images like this, and improve how well I do things.

I have not flattened any layers as this would have been harder to make if I had flattened the images all the time. I use Photoshop CS3 but you can use most image editing software.

I have gone through all the steps but not in detail as this is to show a way of doing something like this. There are 6 stages that I have done to get the final image. Under each stage I have added notes on how to get create this part.

If you would like any help please e-mail me on gillbanksphotography@gmail.com

-------------------------Stage 1-------------------------


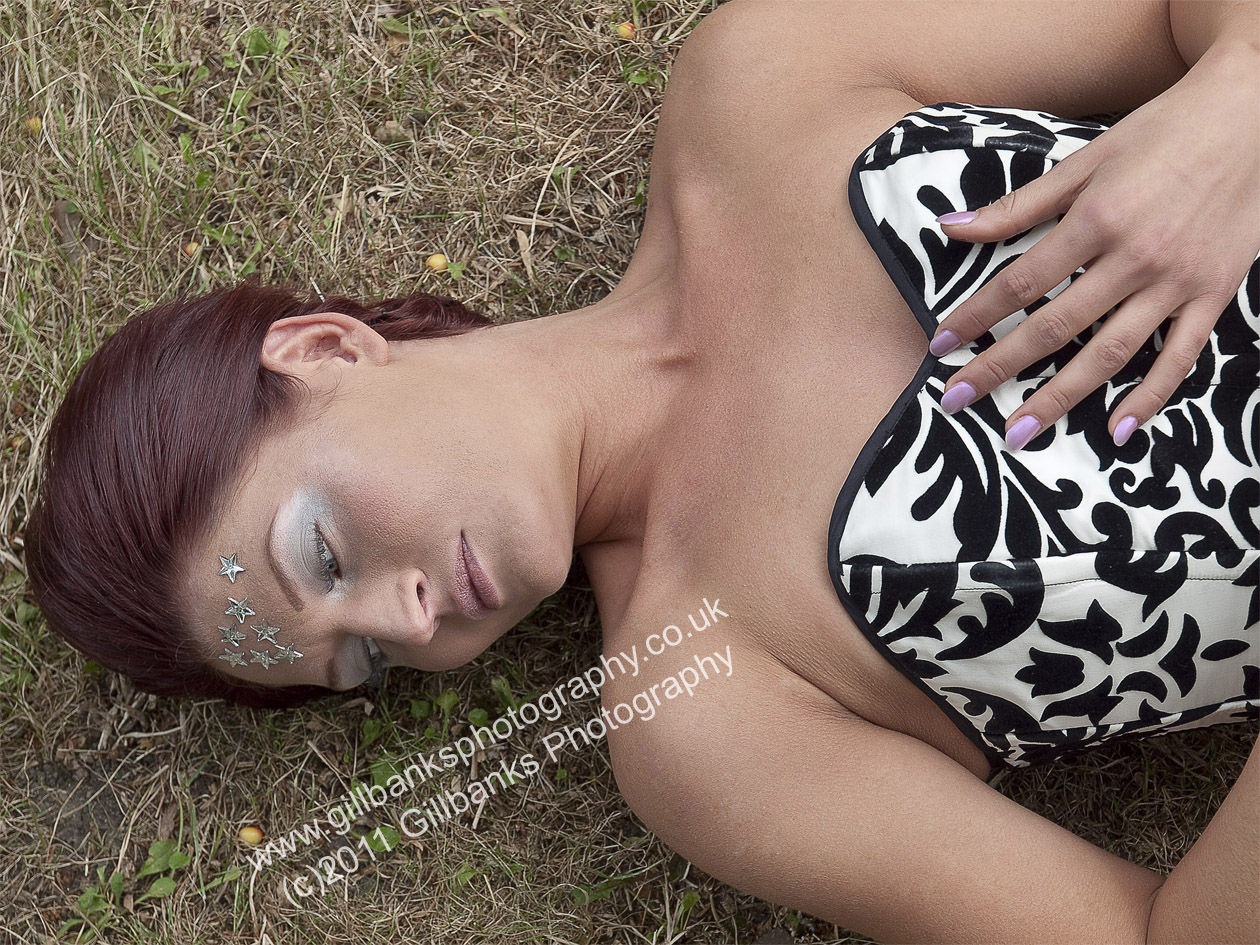
This is the original photo and the starting point for this project. As you can see this image is about right for the chosen to change in to a fantasy picture. There is a good colour plate with the model and woods around.

-------------------------Stage 2-------------------------


I did this by blurring the background and using a mask with a gradual filter on it. This gives great depth of field to an image with out the worry of getting it all wrong. The way I have done this is as follows.

To find the blur I have used go to Filter - Blur - Gaussian Blur then chose your own settings - for this image there is no right or wrong way of doing it so just blur until it looks good.


Then find the masking you go to a button of the Layer Pallet which is a square with a circle on the inside and then you click the white section that comes next to the image. When that is done you click the graduation button which is the white to black on the Tools Pallet. Make sure the White and Black's selected as this will give you an easy way to mask. I have added some images to help you out as this could be very confusing if you do not know Photoshop.


This is the image that is at the background picture. As you can see this gives a different feel to the image already and is looking different to the first as the blur makes it look very different. Which does not help to see the model and this will change later when we fix the model and the fore ground in the picture.

-------------------------Stage 3-------------------------


This was created with a free brush set which you can download called SS-Light Beams. This layer is actually created with 2 separate brushes - the light rays that are long and a short brust.


I changed the blending mode on the lighting layer to Vivid Light. Which has given the image the feel of the sun going thought leaves.

For more information on layer blend modes read this: http://www.mahalo.com/how-to-understand-blend-modes-in-photoshop/


-------------------------Stage 4-------------------------


This is two different layers which I made form the background image. The idea behind this is to place this image on the top of the layer stack. I use a Photoshop addon filter called ReMask which is made by Topaz Labs. This filter can mask detailed images quickly.  I will show you soon many ways that can make this work with and with out this filter.


I have taken the layer of the model and used the Overlay blend mode to give the feel of shadow's as the light hits the models back and the shadows fall to the floor.

-------------------------Stage 5-------------------------


This layer is going to be used for the shadows are was created by saturating all the colour out of the model and the tombstone out of all colour and light - which turns it black. I have also done a vertical flip on these people as well. To flip a layer your should: Edit - Transform - Vertical Flip.

The next part of it is to warp the image, moving it around and to make it look like the light is falling down in that area. The place for this is Edit - Transform - Warp. You can only move them in one way at a time. You will only know how it works when you play with it and that is the best way to find out how things work in Photoshop.


As you can see in this one I have added a blur to the warped shadow to give it a feel that it is someones shadows. I had also copied the tombstone so that it is so that the shadows look real. I have also moved it over a little bit so that there will be a halo effect on the tombstone. Which looks amazing with the shadows. I have also removed the feet so that it looks like there is no shadow there.


This is the same as before but I have changed the opacity I have not put a number as it could change per picture. So that you can see it on the floor as well I have also changed the Blending mode. They are both using Linear Light so that the shadow looks real and not like as If it was put in fake.


As you can see in this image that shadows look like it is part of the whole thing same with the model and the Blending that I have used.

-------------------------Stage 6-------------------------


This is a copy of the lighting group which I put on top so that there was some rays over the top of the model. I use a different amount of Opacity amount and a different Blending mode to get the light the way that it is looking on there. The mode that I picked was Hard Light this is done on the grouping not the items as it does it there itself.

-------------------------End result-------------------------


I am quite proud of this image. It's my first try and I think it turned out well. I would love to get some feedback so please do let me know what you think of the picture or if you need any help with the tutorial.

Please leave a comment at the bottom if you would like to know more.

Sunday, May 15, 2011

Fantasy (Jungle queen)

This is the frist of many that I will be doing of a fantasy style shoot please tell me what you think...  There will be blog on how I have made this coming along soon..

---------------------------------------------------------------------------------------
Version 1
---------------------------------------------------------------------------------------


---------------------------------------------------------------------------------------
Final Version
---------------------------------------------------------------------------------------